
PBR Animation Experiments
Proposal
Hypothesis
In my practice based research module, I intend to explore facial animation for stylised CG characters. The question I will be answering during this project is: “What can exaggerated styles learn from realism?” I chose this question because I want to explore if it is practical to use more intricate facial animations for stylised characters that would likely be featured on children's television programs. As I will be exploring multiple software (Blender, Maya, Max) I will pose another question: "Is knowledge of multiple programs necessary for animators?"
Context
This project will be fully portfolio focused; when this module is finished I intend to have a showcase of high quality facial animations, cycling through emotions and speech. During this project, I will be investigating current methods of facial animation as well as create my own facial animations. Before creating animations, I will be looking at: what software is used (MotionBuilder, NaturalFront(?), Maya); rigging pipelines/workflow; and examples of already existing showreels from various sources (AAA companies - indie/freelance).
I will be comparing realism against stylised facial animations as well as creating realistic facial animations for stylised characters; making sure to make full use of the range of mouth-sounds and not sticking to the typical, faster, and limited shapes/sounds productions these days stick to (Sonic Boom Animated Series, Teenage Mutant Ninja Turtles - 2012). While there is no doubt these facial animations (and animations as a whole) are done to a high standard). I want to test whether it is reasonable to use more complex facial animations on characters like these, or if it’s not as reasonable to apply more in-depth methods to these types of characters (for these types of shows).
Rationale
I chose facial animation for my practice based research as it is an aspect of animation I am not familiar with. Being already interested in character animation, I want to further explore expressive emotion through facial expressions. There isn’t going to be a point with this project where it will be complete; there is no story to end or world to build; practice and pushing the skill ceiling higher with each animated mouth-shape and expression is the purpose of this project.
Being the first time I will be animating faces, I am expecting a lot of failures and problems with this project. Ultimately, these setbacks will assist in creating better animations as I will grow more critical of my productions as the project continues. As this project will be a portfolio piece I need to be very critical of my work; I am wanting to come out of this with as close to industry standard animation as I can get.
Proposed Method of Investigation & Research
I plan to research this project by looking into processes of facial animation as well as referencing how faces are animated within 3D film to gain a better understanding of movement, timing, exaggeration etc. and then putting what I’ve found to test when animating for myself. Reference research will be recorded through notes and annotated videos in order to see the motion of characters while going back to view notes.
I will set myself milestones throughout the project so I can improve at a consistent rate. Beginning with basic mouth shapes, words, sentences etc. and moving onto more complex forms later into the project. I will be benchmarking my animations against others who can already animate facial rigs to industry standard, focusing on mouth movements early on and then moving to animate more of the face (cheeks, eyes) when I believe the mouth has reached a good enough quality.
Benchmarks for Success
My idea of a benchmark of success during this project would be the facial animations seen in the likes of the Overwatch shorts or games such as World of Final Fantasy (i.e male & female lead characters); animation that already uses stylised characters and incorporates almost realistic facial animations.
Tasks for this project will consist of animating the mouth to first fit basic letter shapes; sentences will follow after - beginning short and simple (i.e something a child would likely say) with the next being more complex (i.e something a teenager would likely say). I plan to evaluate my work on how well expressions flow between one-another and how well mouth animations emulate real mouth movements; this can be done by overlaying audio on rendered animations. I will also be evaluating how well these realistic motions work for stylised characters as well as how long it takes to create them - in order determine whether the workflow is reasonable.
Investigation
This page will be dedicated to work I produce during the PBR module. All facial animations produced will be added to this page along with the process I used to create them, an evaluation of my work, as well as reflections of my work. These facial animations will consist of lip syncing and expressions. This method was selected as it will provide me with research-based practice which will incrementally improve my work.
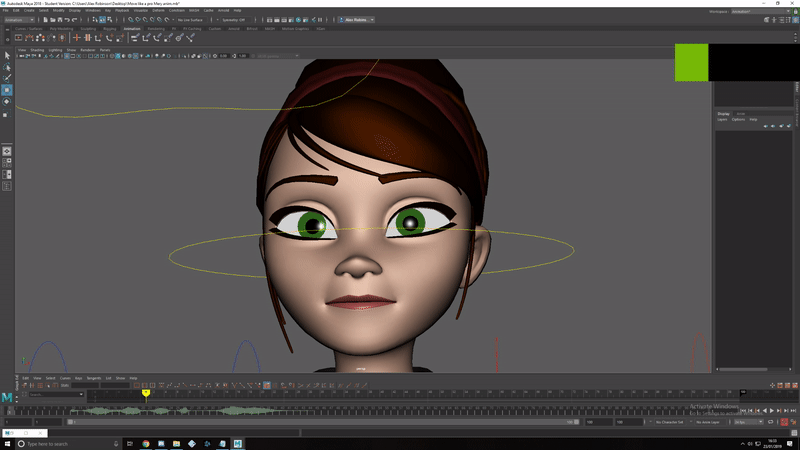
Mery Rig Lip Sync
On 02/01/19 I created a lip sync with the Mery Rig, using Autodesk Maya to animate. My intentions for this animation were to create a lip sync using a sentence an adult would most likely use - this means the lip syncing has to be quick and blend seamlessly.
Animation Method
In order to animate this lip sync I used the facial controller that came with the rig as well as the autokey setting. During animation, I referenced my own mouth and lip movements in order to determine how the rig should move. References were mainly used for words with a more prominent 'R' and 'O' lip movement (right, stop) and for how to blend these words together.
I also referenced the lip syncing section of the Animator's Survival Kit on how people don't articulate every syllable and that you should aim to blend words together. The Trax Editor was also used to edit the audio reference - the timeline was also used to assist in this process (setting the ending frames for the animation).
Issues During Animation
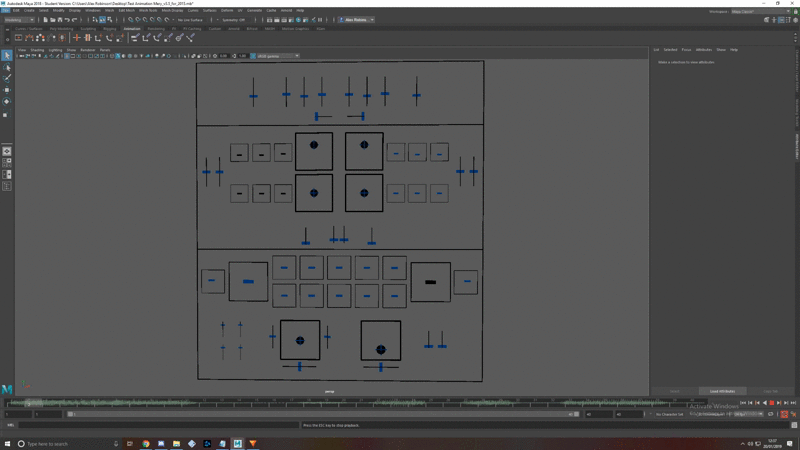
Facial controller for Mery Rig
As this was my first time using Maya to animate, I ran into a lot of problems during the animation process. The first problem I encountered was getting the audio file I imported into the scene to play at the correct point; as the audio I needed was around a minute into the file's playtime. I first tried setting the timeline's frames to start and end at the points I needed using the Time Slider preferences, however, this did not work and the audio file would shift around - playing different parts every time. I was fortunately able to resolve the audio issue by using the Trax Editor to drag the audio clip to the left to have the audio I needed begin at frame 0, and setting the timeline to end at frame 40.

Trax Editor with audio file imported and timeline set correctly. (Facial controller is behind Trax Editor)
After solving this issue, I found that the audio was only playing when I scrubbed the timeline, not when I when to play back the animation in real time. I tried re-importing the audio file which didn't work, I then found a post on Audodesk's website which detailed how to solve this issue.

Reference used to find out how to play audio in Maya. (Link to reference is above)

Settings used for the Time Slider to have audio play in real-time.
As this was my first time animating in Maya, I also needed to learn: how to set key frames and how to edit keys (move, delete) in the graph editor. To set a key frame I needed to press 'S', to playback the animation I had to use 'Alt' + 'V'. Editing keys in the Graph Editor was a bit tricky at first, I kept trying to use the Middle Mouse Button (MMB) by itself to look around the timeline - 'Alt' needs to he held down in addition to using MMB. Left Mouse Button (LMB) and dragging selects any keys hovered over, pressing 'Shift' and MMB allowed me to move the keys along (left and right) without changing any animations. If I moved the frames upward, the translation on the keys would change, resulting in the expression or lip sync to be drastically altered.
I also found that pressing 'Spacebar' while hovering the mouse over a view port will enlarge the view.


Example of correct keys (left) vs incorrect keys (right).
I had problems when it was time to render the animation; there were times I was selecting the incorrect viewport - resulting in rendering the side view or the facial controller. After I managed to render the animation, I found that the audio wasn't with the animation. Looking around at forum posts I found that Maya doesn't keep audio after rendering an animation; a solution to this was to download a video editing software and manually add the audio. When attempting to import the rendered animation into a video editor, the file would import, only to not playback in the editor. To fix this, I made sure the editor's project file settings were correct (same frame rate and quality as the exported animation).

Reflection
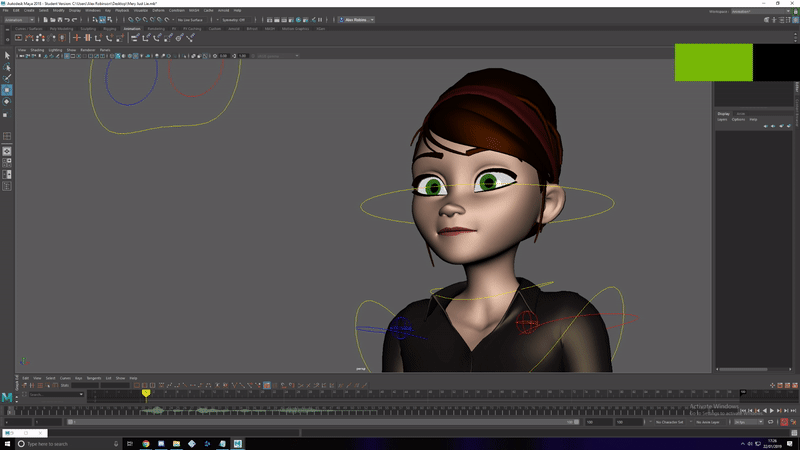
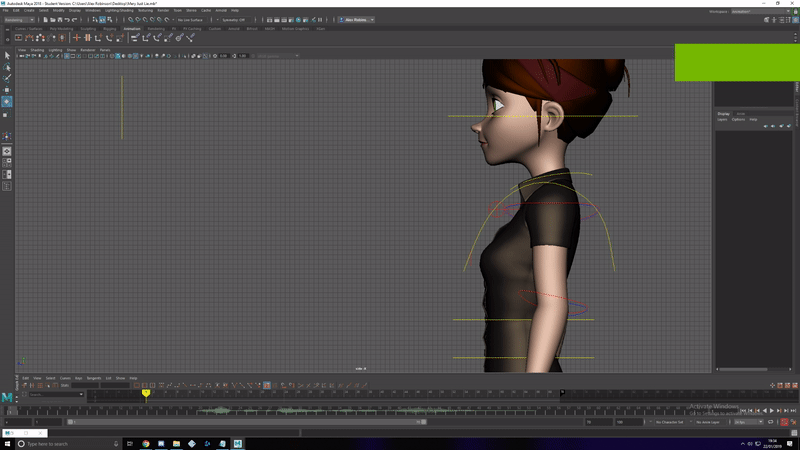
Initially, before trying any facial animation, I assumed animating with bones would be easier, as I would be able to pose the rig without being lost in a bunch of facial controllers. My reasoning for this was that I had only animated with bones previously; this was my first time using controllers to animate. I now see that using controllers is a much easier way to animate (especially when it comes to facial animation) I have also found that I couldn't really get lost in the controllers as they are set with top controllers being for the eyebrows, middle for the eyes and nose, and lower controllers for the lips, jaw and cheeks.
Overall I am pleased with this animation, being my first time using Maya to animate as well as my first time creating a facial animation of any kind. Although there were many problems during the setup for this animation, I now know what to do when wanting to create an animation using audio references in Maya. I am also more comfortable using myself as a reference when animating.
Final Animation Render
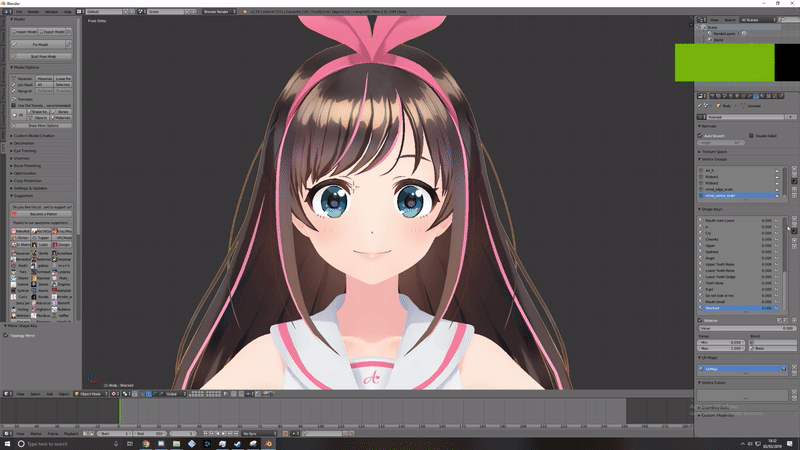
Blender Facial Animation
Intention
For this exercise I intend to create an animation in Blender using the official character rig for Kizuna AI found here. I will list animation processes, issues faced during animation and solutions I found here. For this animation, I intend to use a sentence that anyone would use, an introduction: "Hello, my name is X. How are you?".
Animation Process: Setting Up the Project
As I am now using Blender (as opposed to Maya previously) my workflow is different when it comes to animation. As the model used for this animation is a .pmx file, I need to use a tool in order to import the model. In this case I used the CATS Blender plugin, a plugin used primarily to import and optimise models for use in the popular VR title: VR Chat.
Although this isn't my first time using the CATS Blender Plugin, I did reference the overview video, a 25 minute overview of the plugin showcasing what it can do, while I was first importing the rig to re-familiarise myself with the UI. The video goes over basics like: importing the model, language translation of meshes, bones, shape keys and textures (as mostly all MMD models have Japanese text associated with them).
Overview/tutorial for CAT'S Blender Plugin

Once the model is imported, I fix the model by clicking 'Fix Model' this will automatically parent bones, join meshes, apply textures etc.
I then created a Dope Sheet tab to add key frames to the armature of the model - this isn't needed for the facial animation, this was more muscle memory than anything. However, the Dope Sheet is still needed in order to manage the key frames applied to the shape keys.
Now that this was done, I created a new tab to add the audio reference file to Blender using the Video Sequence Editor tab. I then created another 3D View tab, as the one I used previously was now the Video Sequence Editor. Once this was done, everything was set up and animation was ready to begin.
Video of setting up the animation in Blender.
Animation Process
To animate the shape keys in Blender, I select the shape key I need to animate, hover over the slider, and press I (key frame shortcut), the slider then turns yellow. I then change the value of the slider to what I need. This completes one motion.
I animated straight through, noting what frame words began on and where the most pronunciation occurs (where I need to open the mouth more or exaggerate motions). Only after animating the mouth movements did I add any other motion, such as blinking or head turns. Animating this piece took me roughly two hours to create.
Issues During Animation
The only issues I ran into while animating this was the timing on when the mouth would open and change into a different shape (sound). These problems were easily solved by moving around the frames to fit better with the audio. I found that, in some cases, placing them 1 frame before the speech occurs makes the lip movements flow better.
Relfection
I found this animation much easier to create compared to the Mery Rig in Maya, mainly because I am more familiar with how to use Blender. It is much easier to set up audio references in Blender as I can easily shorten the audio clip in the Video Sequence Editor tab, rather than drag the whole audio clip to the frame I want it to begin on (in Maya).
My experience with Blender's Shape Keys was about the same as the facial controller for the Mery Rig. They're both very easy to use and allow for quick posing - however, I do prefer Blender's Shape Keys as each one is named appropriately, whereas the facial controller was just spline shapes with no noticeable names anywhere (from what I could see with limited knowledge of the program).
I am overall pleased with the results I have achieved in Blender for this facial animation. However as I am aiming to create more complex mouth movements for characters of this style, I would like to try creating my own Shape Keys in Blender for this model in order to achieve this goal.
Final Animation Render
Darrel Rig Facial Animation - Morph Targets
Intention
On 11/01/19 I sat in with the first year students as they were covering facial animation and morph targets in 3DS Max. I used the Darrel rig provided by Lee to create morph targets for the face; consisting of expressions and lip and mouth shapes. During this session I intend to, like the previous animations, create a lip sync animation. I intend to make this animation longer than the previous two, as I am creating my own morph targets I want to experiment as much as possible with exaggerated mouth movements.
Creating Morph Targets
In order to create morph targets I need to add a Morpher modifier onto Darrel. Before I did this I made a copy of Darrel above the original, this will have the Morpher modifier applied to it, the model below will be the model I create my morph target clones from. The video below shows the process I used when creating morph targets for Darrel.
Animation Process
Once I had created mouth shapes for Darrel I went to 11secondclub, an animation website, to find an audio file to use. After downloading one, I imported it to Max using the Dope Sheet editor - the audio clip will now play when I scrub the timeline. In order to have it play in real time, I need to change the frame rate of the animation to 24fps. The process for importing and playing the audio in real-time was similar to the process used for Maya, back in the first animation I produced.
The animation process for this animation is similar to the other two, use sliders to create the poses I need and blend the movements together. Throughout the animation process I was using myself as reference again to grasp how my mouth would move while I said the dialogue I was animating to.
Importing audio into Max
(LOUD)
This is the video I referenced for creating the Morph Targets for Darrel. Even though I was in a lesson about this, I thought it would be good to have a video to reference quickly if I ever needed to.
Before I could create the targets I needed to add a 'Morpher' modifier to the model. I also needed to make sure that the morphed model was also the same poly count as the one with the 'Morpher' modifier on it. Otherwise the morph wouldn't work properly. I couldn't subdivide a copied model and try to pick it from the scene on the morpher, for instance. I also made sure not to stack the same morph target on the 'Morpher', so I wouldn't add the 'Mouth Open' morph more than once.
Issues During Animation
The only issues I ran into during animation were that I sometimes didn't have the correct morph target set up, so I needed to go back and create a new morph target for a certain movement (lips, jaw, cheeks). Other than this there were no other problems during animation.
In the future I will make sure to set up an appropriate amount of morph targets for facial movements - this way I won't have to go back in the middle of animating to create additional targets.
Final Render
Creating New Shape Keys
Today (21/01/19) I will be experimenting with facial expressions in Blender. I intend to create a variety of expressions (happy, sad, angry, surprised, confused) and blend them together in one animation. Going into this exercise, I predict I will have to create a lot of shape keys, as this model's shape keys are quite limited when it comes to facial expression (being a stylised character, the jaw doesn't move and expressions aren't very realistic).
Animation Process
Using reference images from google, I began creating the initial poses for the expressions. As I was creating the poses I found that the shape keys provided with the model I was using were not enough to create some of the expressions I wanted to use; I solved this by creating new shape keys. These shape key movements consisted of eyebrows, eyelids, mouth and jaw. I found these shape keys relatively easy to create - the only problem I encountered was moving polys that I selected by mistake. This was fixed by removing the selection on them.
One issue I couldn't solve was part of the mouth sack mesh showing when the model's mouth widens. I was able to move part of the mesh into the correct position, however, I couldn't find the correct position for the sides of the mouth sack. Due to this issue, the teeth partly clip through the mouth sack; the mouth sack is also visible at the sides of the model's mouth.
Before I could create any new shape keys for the model, I needed to research how I could create them. I quickly found a tutorial covering this subject. Seeing as though the model I was using already had a 'Basis' shape key, I only needed to click the '+' icon once to create a shape key. I then went into edit mode with the shape key selected, edited the part of the mesh I wanted to animate, then came out of edit mode, completing the shape key. The manipulation of the mesh snapped back to normal - changing the value of the shape key to 1.0 brought the manipulation back.
I go into detail about the shape keys I created for this animation later in this reflective log; showing what each shape key does.

In total, I created an additional eight shape keys for this model during the animation process. The expression I had the most trouble creating was for the 'Shocked' expression, as I had to create two additional shape keys for this pose (a wider mouth, and jaw movement). I found it difficult to pose the jaw correctly at first, sometimes applying the movement to the incorrect shape key and having to start over. Although after some trial and error, I was able to obtain a pose I was satisfied with.
Highlighted: New Shape Keys created for this animation
After the facial expressions were animated, I moved on to animating the model's neck, chest, and hair bones to add more life to the animation as well as to further portray the emotions shown. An issue I had while animating the head movements was how the hair should react to the movements I was animating. To gain an understanding of this, I used t-shirts that were in my room as reference, swaying them back and forth to see how they reacted to my movement.

Example of hair reacting to movement
(Incomplete)
Improvements to the animating in the gif above were made, such as secondary movement on the model's neck to have her head move forwards before she jolts back; the expression was also timed to occur a few frames after the jolt happens. This was done due to taking reference of myself doing this movement - finding that I moved my eyes slightly after my head/shoulders.
Whilst I was creating new shape keys, I wanted to have the manipulation I made to one of the eyelashes be applied to the other, so I looked for ways I might be able to do this. I found that I could 'mirror' the movement of the shape key to the other side of the face, meaning I would only have to deform one eyelash (left for example), mirror the shape key, then the movement would be applied to both eyelashes, effectively cutting the time I would need to use deforming both.
To the right is the tutorial I found for mirroring shape keys. After following what was done in the tutorial I found that mirroring the shape key I had created forced the entire head to invert (right side transforms to the left) - some of the polygons for the hair were also acting strangely, splitting in different directions.
I was unable to find a solution to this after trying to work around it myself for a short while. In the end I carefully deformed both eyelashes, making sure to have them as identical as possible.
Result of mirroring the shape key
In the above GIF I tried to mirror the 'Shocked' shape key which widens the models eyes. While both eyes do end up widening, the entire mesh, expect for a few odd polys, will mirror.
Reflection
In this video I give a commentary on the shape keys I made and where they were used in the animation.
I feel I could have created more ambitious shape keys for this animation, I could have even deleted shape keys and remade them myself for the experience. Despite this, I feel as though this exercise was a success. Before I started the animation process I had a clear image in my head of what I wanted this animation to look (how the expressions and head movements would blend together) and I believe that I have achieved this goal. Although I wasn't able to find a solution to the mirroring of the shape keys other than deforming both eyelashes, I did manage to get them to both look identical in their movement.
If I were to do anything different in the future, I would attempt to create more ambitious shape keys as well as attempt to create more realistic expressions. With he final expression (anger), I was unable to create any key features that would be found on real-life faces; for example: scrunches around the nose. To achieve this with models of this style, I feel as though I would need to create textures to fill in the blanks - I may need to research this for future reference.
Final Animation Render
Combining Lip Sync and Facial Expressions
Today (22/01/19) I will be attempting to combine both lip syncing and facial expressions into one animation. I will be using the Mery Rig and animating in Audodesk Maya for this exercise. I will aim to animate lip syncs for two sentences during this exercise. The sentence I have chosen to animate to is "Next time just lie".
Animation Process
I first began by blocking out the animation for the characters movements as they say their dialogue. This started with creating the key poses for the animation, then incrementally adding more in-between the poses until the motions were complete.

Completed Key Poses
I first created key poses without the addition of any facial animation as I wanted to get the posture of the character model correct. Now that those poses were complete I moved on to add some eye and mouth movement to the animation. During this section of the animation process, I added more mouth than eye movement as I thought it would be best to get the general movements in the lips completed to give me a sense of how they should look as the audio plays. Whilst I was animating I found that this rig has a poseable tongue, something I didn't find during my first session animating this rig. I made sure to take advantage of this during my animation.
Next I want to add more detail to the face in the form of laugh lines; I also need to add animations to the eyebrows. I would like to aim for an angry or fed-up expression with this animation.

Key poses with additional mouth and eye animations.
As I was animating, I found that the only way to accentuate the laugh lines was to move the nostrils upwards and seeing as though I was aiming to create a fed-up expression, this did not fit with the tone I had in mind. I did try to add this to the animation but found it made the expression difficult to look at as it didn't look quite right.

Comparison between normal nose placement (left) and altered placement (right).
What I aim to do next are some arm movements. When the word 'lie' is spoken, I want the rig's arms to move forwards.
To the right is a gif of the finished movement.
Reflection & Conclusion
I feel that there are some parts of the animation that can be improved, an example of this is the arm movement. Having the arms move a little faster would have brought additional impact to the animation; having her hands react to this movement would have also made for a better final product. In terms of the facial expression, the position of the mouth possibly could have been altered to be lower. For the eyes, instead of opening them into a squint. they could have opened fully - transitioning into a squint.
Despite this, I have achieved my goal of creating a lip sync coupled with facial expression and head movement. In the future I will make sure to try many subtle movements with the characters face (like the eye movements mentioned above) and try to add nuances during the animation.
Final Animation Render
Lip sync & Facial Expressions Cont.
Intention
Today (23/01/19) I will be continuing to create similar work to yesterday's, in that I will be using both lip syncing and facial expressions during this exercise. I will be aiming to animate a more exaggerated head movement to try to emphasise some pronunciations (primarily the P and O sounds). The line of dialogue I will be using in today's animation is "You move like a pro!".
I will also be using the Mery Rig for this animation as well as animating in Maya as I feel I need practice in the software.
Animation Process
Workflow for this animation is the same as yesterday's. I start by blocking out head movements and gradually add more to the animation. After head movements are created, I moved onto eye movements then blocked out mouth shapes.

Blocked out head and eye movements.
After the head and eye movements were done I began animating some rough mouth shapes. During this process I also added subtle movement to the eyes at the end of the sequence - this was done to give the animation more life and narrative, as I wanted her to appear to be talking to someone. This is also the reason she is constantly looking to her right. Initially I wanted her to have her head rotate the other direction when she says "pro" but this turned out looking unnatural and awkward.
I am still unsure as to if I have gotten the eye movements correct and I may change the timing when I am touching up the animation.
Final Animation Render
Mery Facial Expressions
During this exercise (31/01/19), I intend to create a range of facial expressions which transition between each other (like the one I created in Blender using Kizuna AI). My aim for this animation is to create more intense expressions (in terms of looks) as the Mery Rig offers more with her facial rig compared to Kizuna's shape keys.
Animation Process
I began by creating each initial facial pose on their own frame and later going back to set up the timing of when each part of the face would move. I would put the eyebrow timing first, followed by eyes, nose then mouth; time between them moving would only be about 3 or 4 frames - just subtle enough.
As I wanted to create more exaggerated expressions, I tried to stretch the face as much as possible where I was able to - I tried to test this mostly with the first expression.
Problems I faced while animating were the timings of facial features. I did manage to sort most timing issues out, but the eyes ended up snapping around at some points of the animation; due to time restraints I wasn't able to correct this.
Final Thoughts
While I achieved my goal of creating facial expressions with the Mery Rig, I feel as though I could have done better with this animation. It doesn't feel on-par with the expressions I made with the Kizuna rig and features less emotive motion when compared. I admittedly don't know how to delete parts of mesh in Maya; while I could have looked this up I felt it would eat into time I could have spent animating. With the deadline for PBR work being today - I decided to go through with animation instead of searching around for too long. I think I could have achieved a better animation if it were just the head - similar to the Kizuna rig.
Timing is also not perfect, with the second expression coming out too slow. Although the expressions were well done, the timing of this animation lets the whole thing down, along with twitchy eye movement.
Final Animation Render
Facial Animation Conclusion - What I've Learnt
Initially, my goal for this project was to answer: 'What can exaggerated styles learn from realism?'. After animating I quickly changed the direction of the question I was aiming to answer; coming to the conclusion of answering, multiple, smaller questions, rather than just one.
As I was using multiple software to animate, one question that I asked myself was: "Is it necessary to learn more than one (3D) animation software?" The conclusion I came to was that, while the majority of the industry uses Autodesk Maya, I believe it could be beneficial to learn other software. Blender, for example, is a 3D program that has been around since 1998 and has only recently (within the past few years) attracted more attention.
Compared to Maya, Blender is free and built upon by the community, meaning the program has multiple features, including: sculpting, animation, rigging, modelling, texturing, video editing. While Blender may share many features with Maya, I believe it would be beneficial to learn at least the basics of animating in Blender.
Blender's new 2.80 update is currently in open beta and comes with even more features than previous versions (2.79). An entirely new UI has been added, replacing the old. Blender 2.80 is adding support for 2D animations that can be animated within a 3D space. Eevee, a new real-time renderer that powers the new, real-time view port, added in the 2.80 update. Other smaller details include changing the primary select button on the mouse from Left Mouse Button to Right Mouse Button, allowing those from other software's to adapt to Blender.
During this project, I've learnt from both research and creating facial animations, the mouth doesn't doesn't move to articulate each syllable (as stated in the Animator's Survival Guide). I have also learnt that a person's mouth doesn't close after each word, that their mouth blend's words together seamlessly. Looking at early examples of facial animation in games (Sonic Adventure) and comparing them to more modern examples (L.A. Noire) showed me how facial animation should be done, compared to how it shouldn't.
I've tried my best with these animations to blend mouth shapes together for seamless lip syncing, which I believe I have come close to doing, but not mastered yet. I have also learnt the basics of animating using Autodesk Maya and have come accustomed to using facial controllers for animating. Creating my own Morph Targets (Autodesk 3DS Max) and Shape Keys (Blender) have brought me closer to creating my own sets of facial controllers/animation sets.
I tried to fuse realistic mouth shapes with stylised characters during this project, but found myself getting comfortable with the provided Shape Keys in Blender. While this isn't much of an issue, I could have done more to possibly create more exaggerated mouth shapes - but in the end, I am pleased with the outcome. I found that with Maya I was able to do more with the Mery Rig as it comes with a facial controller, allowing me to create these mouth shapes on the fly. In contrast, the rig used in Blender wasn't as expressive, in one case needing entirely new shape keys - on top of the shape keys that come provided with the rig. The model was also restricted to what ever morphs were assigned to the shape keys - vastly limiting motion compared to the Mery Rig. Despite this, I found Blender (for myself) the better program to animate in, as I have previous experience animating using Blender. I am more accustomed to the UI and shortcuts of Blender, which speeds up my workflow compared to Maya.
When animating in Blender, I find it easier to manage my key frames (with Dope Sheet to the left of 3D view), for example: I can press 'B', then click and drag to select frames, press 'G' to grab them and move the frames with left mouse button. I don't have to worry about accidentally altering the axis (X,Y,Z) the frame affects (like with Maya) as the frames are locked to the shape key's channel on the Dope Sheet - they can only be moved forward or backward in the timeline.
In contrast to Maya's Trax Editor, Blender has the Video Sequence Editor, which I found much easier to use. With Maya, I had trouble cutting the audio in the Trax Editor. I would select the option to segment the audio, click the track, and nothing would happen - I couldn't find a solution after looking around and conceded to dragging the audio I needed to frame 0. With Blender, cutting the audio worked first time with no issues.
While changing views in Maya isn't a difficult task, it felt much faster using keyboard shortcuts (numpad) in Blender, even if it meant taking my hand off the mouse for a second. Pressing '5' changes between Perspective and Orthographic views whilst in Orthographic, zooming won't clip the model. Pressing '1' gives a front view, and '3' gives a left view; while holding 'Ctrl' and pressing '1' gives a back view - 'Ctrl' and '3' gives a right view. Camera manipulation as a whole felt a lot less limited in Blender. The majority of the time in Maya, a message would appear informing me that 'Orthographics are currently locked', stopping me from moving the camera. While a quick internet reference solved this problem; it was still rather bothersome.
At the beginning of this project, I thought it would be easier to set up bones for the facial rig and animate using those. I have since changed my mind to prefer Shape Keys and facial controllers over bones. The reason I believed this was due to my lack of experience using anything like Shape Keys or controllers - I couldn't imagine how the workflow behind animating with those would work. First-hand experience gained from this project has helped shape my opinions on what method I prefer while going about facial animation.
In the future, I would like to add more movements to characters during dialogue (jolts, sighs, jumps) to bring some more charm or seriousness to the animation. I tried this somewhat in the last animation I produced (You move like a pro), where her fists are clenched and shoulders raise up - I would like to take the character motion in future animations a little further than this. On the other hand, I am focusing solely on facial animation, so I don't want to stray too far from my goal, starting to focus more on body movements than facial movements. To add to this, in the future I would find it beneficial to take my animations into a game engine i.e. Unreal, Cryengine, Unity, in order to understand the workflow behind creating animations specifically for games - this could be a future project of mine.
I think I was at least able to come close to realistic lip syncing during this project. I aimed to keep movements smooth and consistent, making sure not to animate the mouths like you see them on children's TV shows.
Presentation Feedback
Today (04/03/19) I presented my research and work to my class. Here I will talk about the positive and negative feedback given from the presentation.
Positive feed back mentioned that my mention of the project change (changing how I looked at facial animation, what questions I asked while on the project) was good and gave a clear understanding of where I wanted to aim with the project. Slide design was also noted to be a positive, stating that: the colour design was fitting; use of imagery is good; using bullet points instead of paragraphs is a plus.
The use of videos to showcase my animations was good as it added some interactivity to the presentation, GIFs were also used to add more diversity and give the viewers something else to engage with. When playing animations, some were significantly louder than others, which came as a shock.
I was able to recover well from this and keep the presentation going without stopping; when the louder animations started I commented on the noise in a casual, joking manner which lightened the shock. Sometimes, the full audio for the animation wouldn't play - cutting out the first second or so. In order to recover this I would mention what the full audio should say.
Technical language was used well when describing the animations and software (though I feel as though I could have gone into a bit more detail on describing the animations). The presentation was also short which was described as a plus.
The presentation wasn't overly professional; it was described that I presented like an animator, not like someone trying to sell something. Moving around was described as a plus too, I was more in my element when I was clicking and pointing to things on the screen, rather than standing still and talking.
Aspects to work on for future presentations are the methodology and referencing. I need to be more structured and clear in my explanations as to the methodology I used when animating a piece of work. In the future, I will need to make my references clearer. Referencing the Animator's Survival Kit was good, in the future I need to be clearer in describing what I used from the book (or any other references) and I should have made multiple references back to the kit during the presentation - instead of talking about it for one slide and then moving on.
In the future I will aim to describe my workflow much more clearly. I also need to break out of the habit of moving on to the next point if I blank on something.